Synology NAS hosting
This procedure if for Synology NAS running DiskStation Manager (DSM) version 6.X.
Pre-requisites
Packages Installation
Open the DiskStation Manager interface. Use the Package Center to install the following packages (note they may already be installed):
- Web Station
- MariaDB 10
- phpMyAdmin (only required for initial set-up of the database, may be removed once webtrees is running).
- PHP (install the latest version available for your NAS, 7.4 being the minimum recommended version).
Webstation configuration
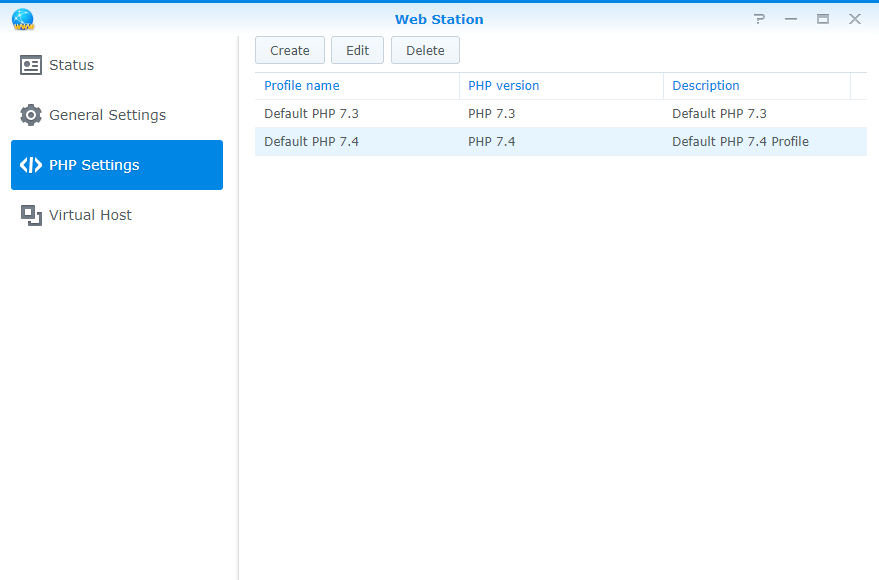
- In DSM, open “Web Station”.
- Click on “General Setting” and check which PHP profile is being used (“Default PHP 7.4” in the below example):

- Click on “PHP Settings” then select the the PHP profile used by Web Station:
- Edit the selected PHP profile, make sure
- all extensions are activated in the Extensions list.
- neither “Enable Xdebug” nor “Enable display_errors to display PHP error messages” are selected.
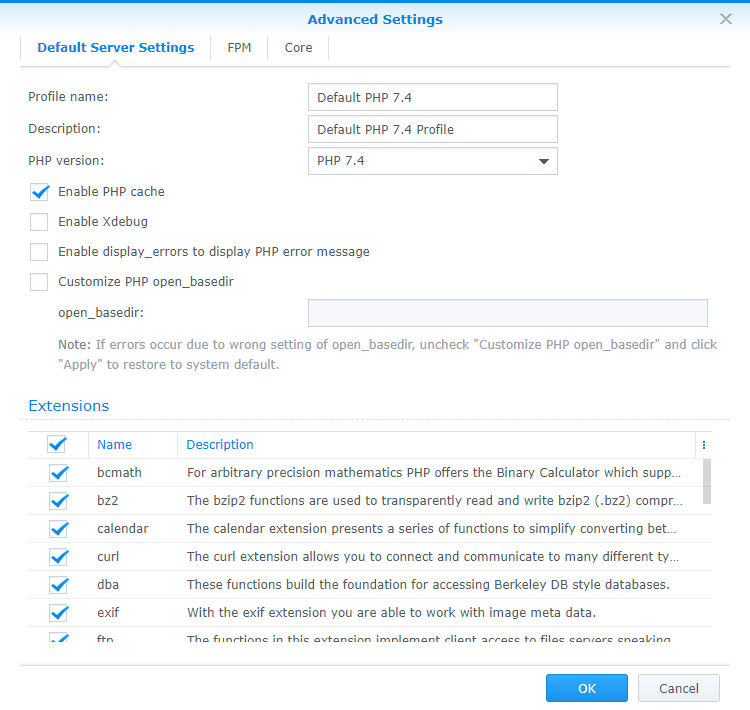
- Click “OK”.
MySQL/MariaDB configuration
Confirm MySQL/MariaDB server port
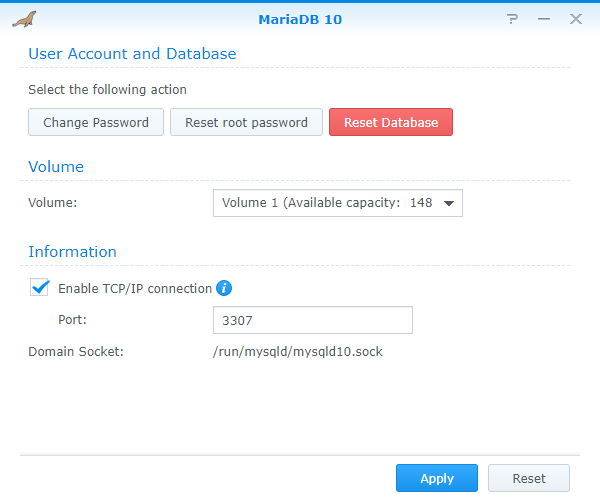
- In DSM, open “MariaDB 10”.
- Check/confirm which port MariaDB is running on. Default is 3307.
MariaDB user and database configuration
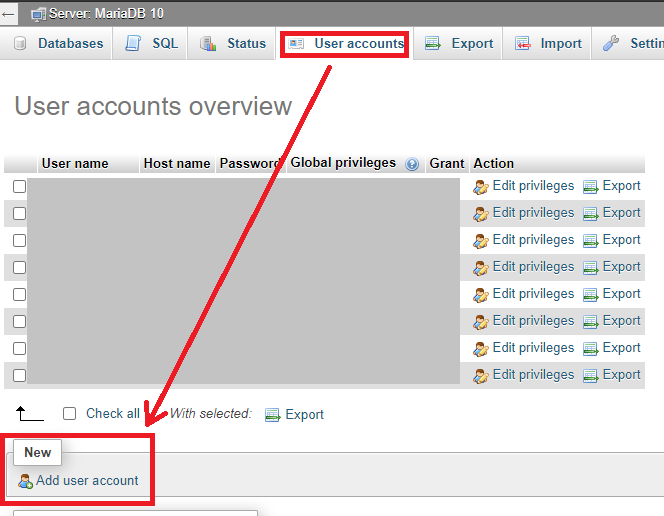
- In DSM, open “phpMyAdmin”, and log-in using a profile allowed to create databases and profiles/users (e.g. “root”).
- Click on “User account”, then click on “Add user account”:
- Choose the database sessings:
- “User name” will be both the user name and the database name. Note it in order not to forget it!
- “Host name” must be set to “localhost” for safety reasons.
- Generating a complex/random password is recommended. Note it in order not to forget it!
- Tick “Create database with same name and grant all privileges.”
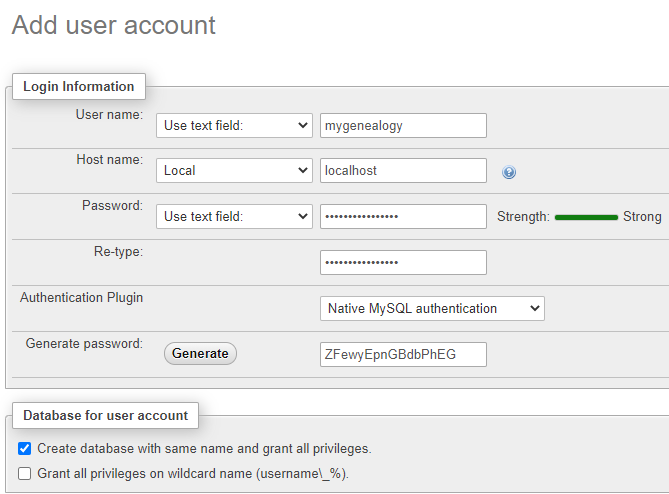
- Click “Go” at the bottom right to generate both the user and its associated database.
Webtrees installation
Moving the files to your NAS
- Having installed PHP >= 7.4, you can safely download the latest version of webtrees.
- Unpack this file on your computer. You should have a folder called
webtrees. - On you NAS, open “File Station”, navigate to your
webfolder. - Create a
webtreesfolder (or any other name) inside your . - Drag and drop the content the
webtreesfolder on your computer in thewebtreesfolder created at step 4 (“File Station” supports multiple files and folders drag and drop).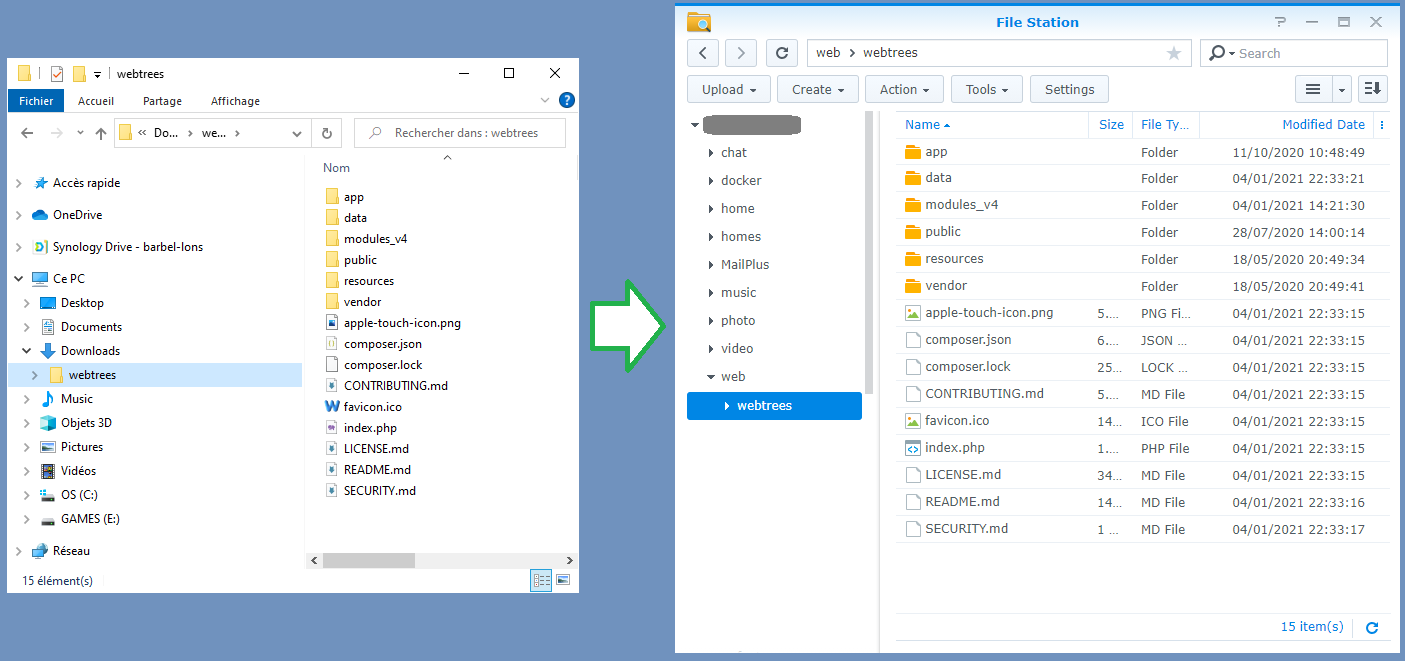
Setting main folder rights
- Still in “File Station”, right click on the
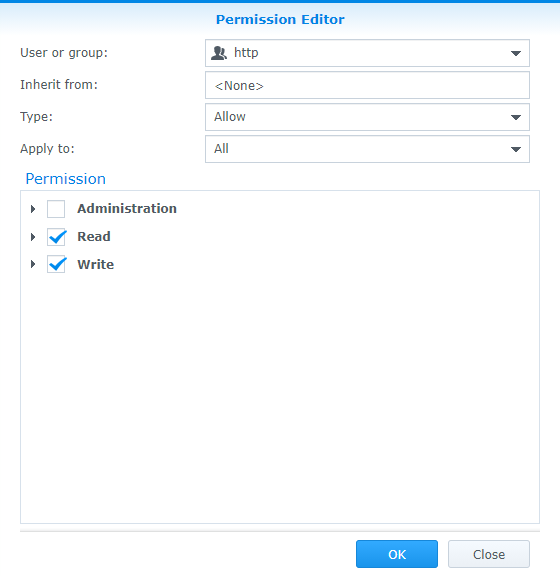
webtrees(or any other name) folder you created at step 4, then click on “Properties”. Click on the “Permission” tab. - Click on “Create”, then fill the “Permission Editor” window (this will allow webtrees to automatically update):
- User of group: http
- Inherit from: <None>
- Type: Allow
- Apply to: All
- Leave “Administration” unticked.
- Do not select anything in “Administration” rights.
- Select everything for “Read” rights.
- Select everything but “Delete” for “Write” rights.
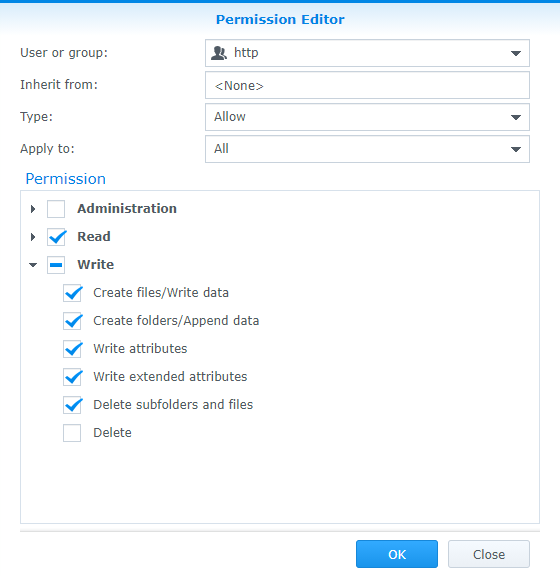
- Once done click “OK”.
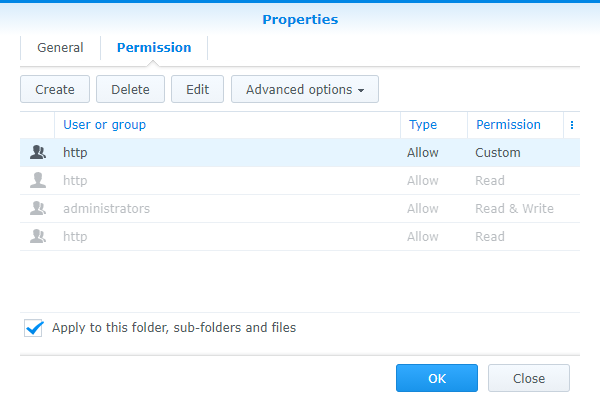
- Select “Apply to this folder, sub-folders and files”, then click “OK”.
Setting main folder rights
- Still in “File Station”, right click on the
datasub-folder of your webtrees install folder, then click on “Properties”. Click on the “Permission” tab. - Click on “Create”, then fill the “Permission Editor” window (this will allow webtrees to automatically update):
- User of group: http
- Inherit from:
- Type: Allow
- Apply to: All
- Leave “Administration” unticked.
- Do not select anything in “Administration” rights.
- Select everything for “Read” rights.
- Select everything for “Write” rights.
- Once done click “OK”.
- Select “Apply to this folder, sub-folders and files”, then click “OK”.
Configuring webtrees
- Run the webtrees setup wizard.
- Once at the “Database connection” step, enter the following settings:
- Server name: 127.0.0.1
- Port number: 3307
- Database user account: the one you noted at step 3 of “MariaDB user and database configuration”.
- Database password: the one you noted at step 3 of “MariaDB user and database configuration”.
- Database name: identical to the database user account.
- Table prefix: leave “wt_”
- Last step is to create the user account that will be used as your main Webtrees account.
Any question, post it on the webtrees Forum.